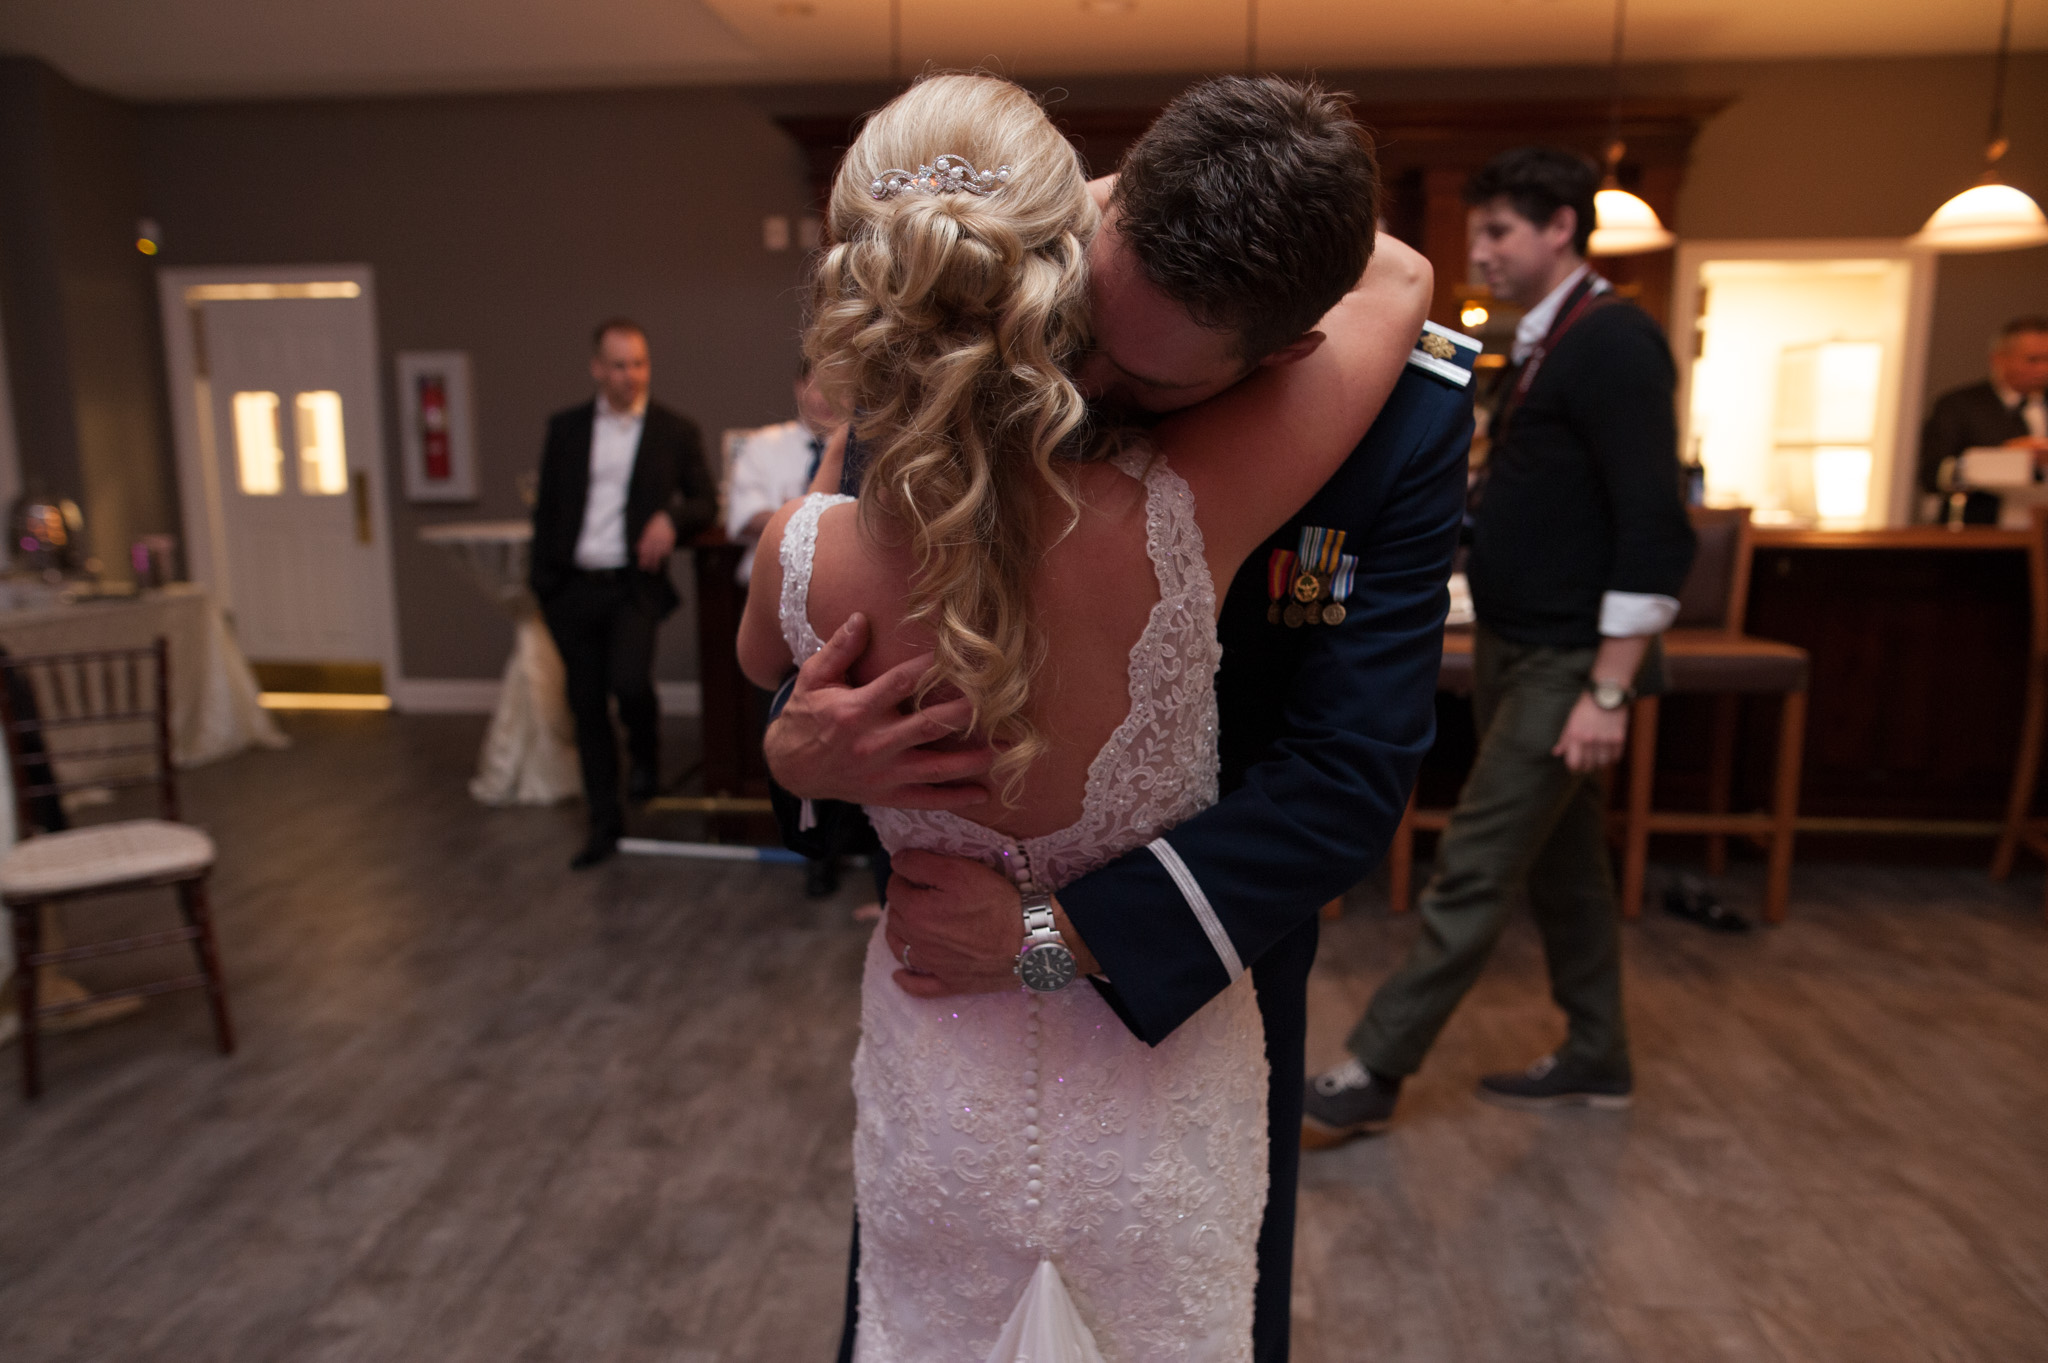
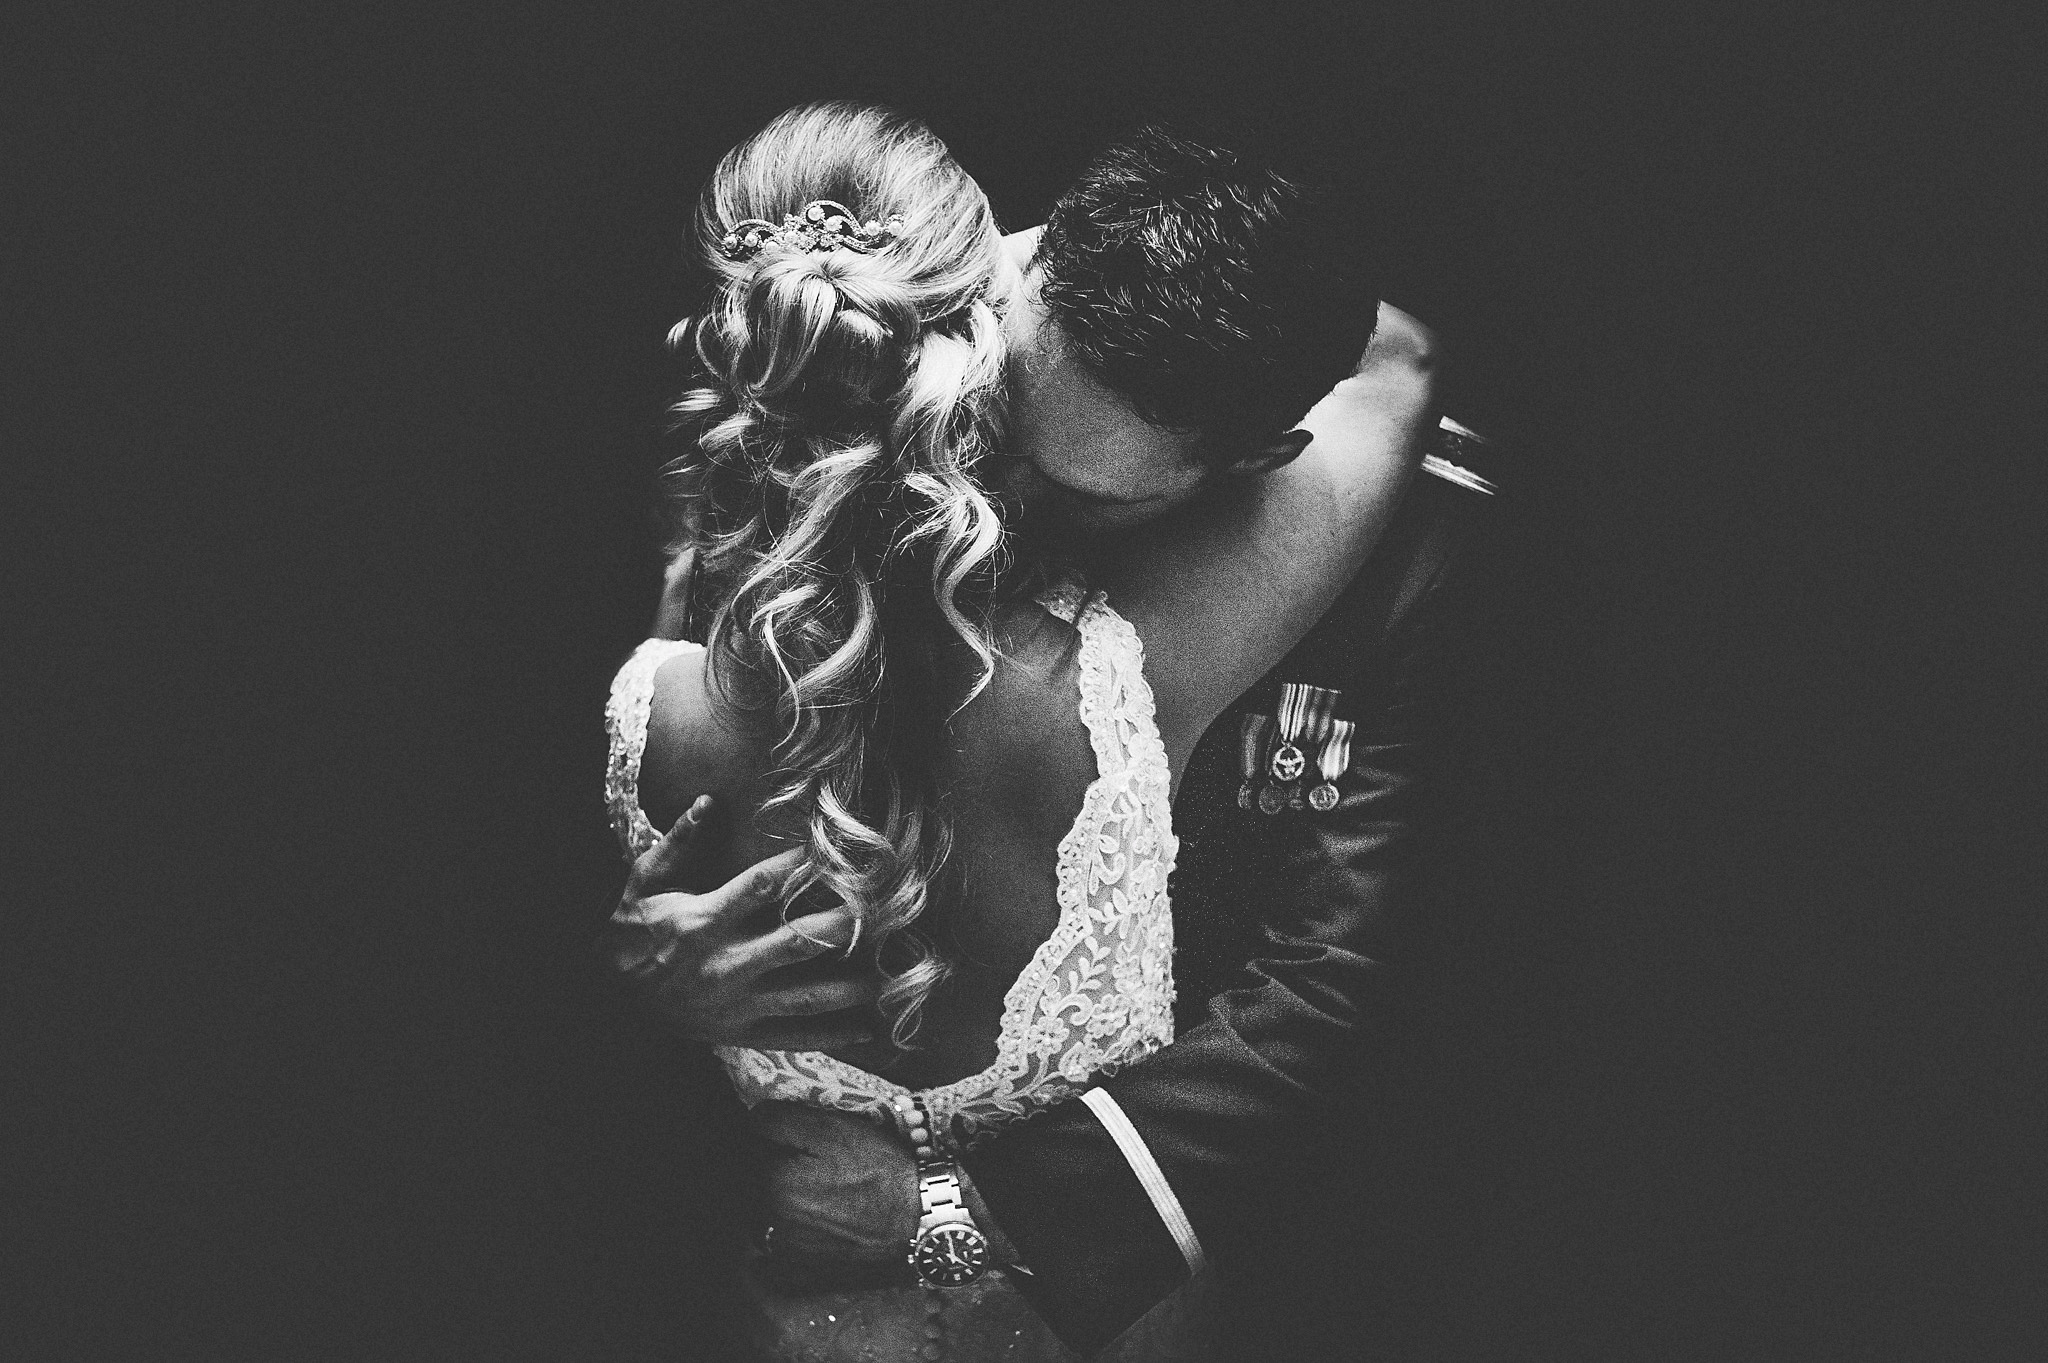
Before And After// Northern Virginia Wedding
Why did I re edit a photo?
Sometimes I have to look away from photos to actually get an idea on what to do with them. This wedding was shot with a good friend of mine Mike Steinmetz. The wedding was shot a couple months ago and at the time of editing this I was actually cleaning up my Lightroom Catalog.
The photo definitely caught my attention but there were distractions to the background. So I decided to experiment a bit to see if I could save the image. Luckily I could with a couple minutes of editing and some coffee.
The post processing isn't too difficult in all honesty. It was more tedious than anything. I'll go through the steps and why I did them.
Picking a preset
Picking a preset is one of the first steps and the easiest to do. I use presets because it speeds up my workflow a lot compared to if I were to manually change the sliders to get the same look. Presets aren't a definite in my work they all have to tweak massively because I use them as a base then go from there to get the look I prefer.
Radial Filter
The radial filter was used to create the halo of light that the couple has in the image. I also used to darken the outside the subject. I inverted the filter to only affect the area around the filtered area.
Crop
Don't be afraid to crop your images. But keep in mind there is a limit to everything. I only crop a small portion of the photo. I don't go overboard because I feel it's a little lazy doing extreme crops to photos when it would have easily done in camera.
Adjustment Brush
The adjustment brush is one my favorite tools to use by far. I used the tool a lot in this photo. For the first part I used it to darken the space around the couple that the radial filter didn't get. I turned down the exposure all the way down to darken the areas as much as possible.
Dodge and Burn
This part of the processing was the most time consuming. Once the couple was surrounded by darkness it was time to pull them out of the shadows and add contrast to them. Dodging and burning is really tedious but it can definitely bring photos to life. I used the adjustment brush to dodge the highlights of the image like the dress, details, and parts of the body that needed some nice brightening. Burning was used to contrast the lighter parts of the image like the hands, hair and the shadows so the image had a nice fall off in the shadows.
Sharpening and Grain.
These are the final touches that I give to my photos. I add some sharpening but not much because too much looks awful. Lastly some grain to give the photo some texture in the shadows and highlights.
My Post Processing Video For The Photo


